If you're someone planning a new decking installation to refresh your outdoor space, it's only natural to have a few concerns and reservations about potential pitfalls, especially if you consider yourself more of an enthusiastic DIYer than a trained professional. From fixings to subframes, we've pulled together a helpful list of common installation mistakes.
Before you run into avoidable errors that could delay your project — or even worse, lead to costly repairs — let us walk you through some of the most common decking installation mistakes, along with the key things to keep in mind before you begin your decking installation.
Failing to Provide a Drainage Slope
When preparing the base for your decking substructure, it’s important to create a slight slope to help with drainage and prevent water from pooling on the surface.
The slope required is very subtle, so don’t worry, your deck won’t look wonky! At Cladco, we recommend a gentle gradient of approximately 5mm per metre.
While this might seem like a minor detail, it makes a big difference, allowing rainwater to drain efficiently during wet weather and helping to prolong the life of your decking.
Using a Weak or Old Subframe
It probably won’t come as a surprise, but in any construction project, the foundations are a vital element that deserves proper attention. In the case of decking, the decking frame is hidden from view once the boards are laid, and because of this, it can be tempting to try and cut corners in an attempt to save time or reduce costs.
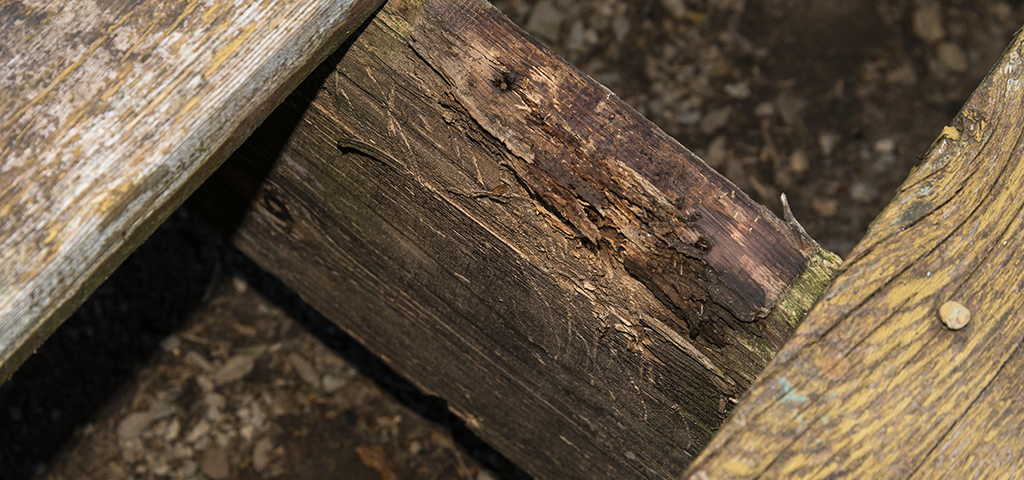
In reality, using a weak or old subframe can cause your project to fail before it even gets off the ground. Even if timber joists appear sound, they may be old, damaged, or even infested with insects. Unlike traditional timber decking, composite decking boards require much greater support to stay strong, stable, and long-lasting, meaning that despite appearances, your old substructure might not be up to the task.
At Cladco, we supply timber, recycled plastic, and composite joists, giving you the flexibility to create a subframe that pairs perfectly with your chosen decking board type. Using unsuitable joists will compromise the installation, potentially leading to board movement, cracking, or splitting over time.
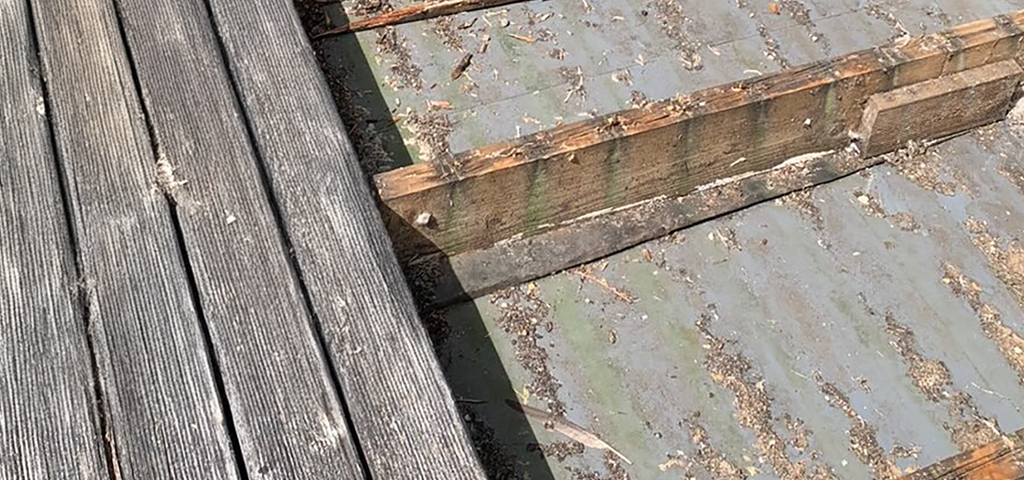
Poor Ventilation Under the Deck
Another factor often overlooked in the early stages of a decking installation is ventilation. When rain lands on your decking boards, the water drains through the gaps and onto the substructure below. Without adequate airflow, the substructure can remain damp for extended periods, increasing the risk of rot and degradation. This applies not only to timber joists but also to composite joists, which contain natural wood fibres and can still absorb moisture.
At Cladco, we recommend that if you're installing decking in an area with poor ventilation, you allow for an airflow gap of 30mm for composite joists and 50mm for both structural composite joists and recycled plastic joists. Failure to do so can allow moisture to be absorbed into the board and give mould spores a chance to penetrate it permanently.
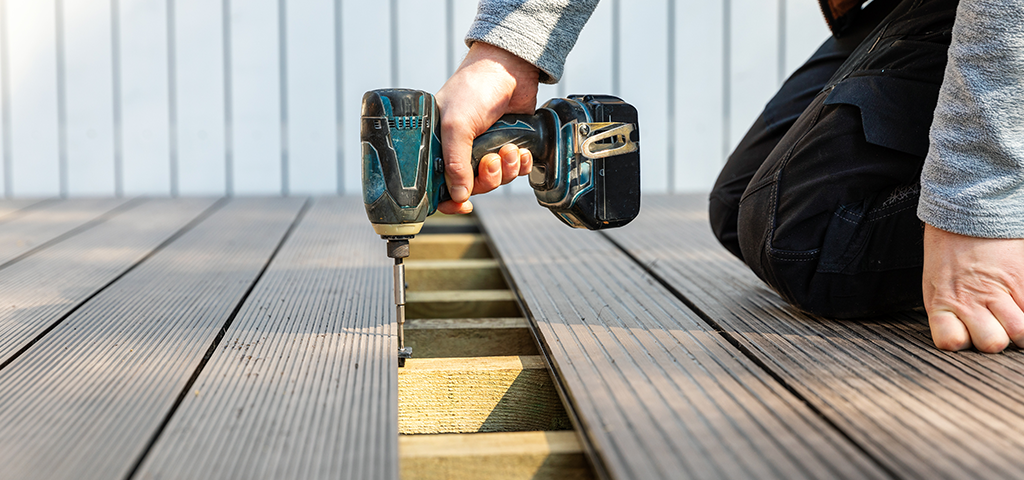
Failing to install Double Joists at Butt Joints
When installing composite decking boards over 2.4m in length, it’s important to check the spacing and layout of your decking joists, especially at the butt joints, where two board ends meet.
Double joists - two joists positioned side by side to provide essential, dedicated support for each board end - must be used at these joints to prevent long-term damage. This setup allows each decking board to be fixed to its own joist, rather than relying on a single joist to support both ends. Using just one joist puts it under excessive stress, which can lead to cracking or splitting over time, and cause an unwelcome headache later on.
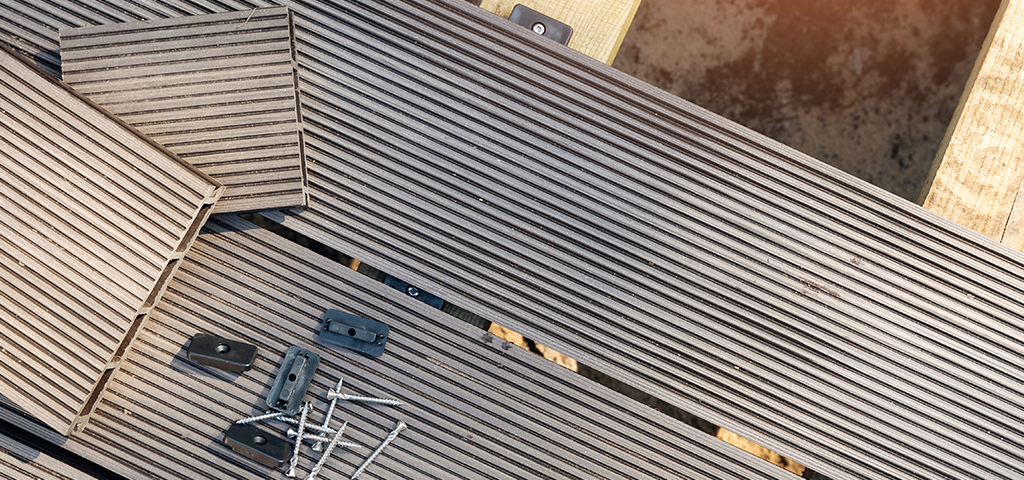
Insufficient Gapping Between Butt Joints
Now that we’ve avoided the common pitfalls with subframe construction, it’s time to start thinking about laying the decking boards themselves.
One of the most frequent mistakes made when laying composite decking is failing to leave adequate expansion gaps between the butt joints — the points where two board ends meet. Because composite decking contains natural wood fibres, it expands and contracts with temperature changes, much like traditional timber. Without proper spacing, this natural movement can lead to damaged boards over time.
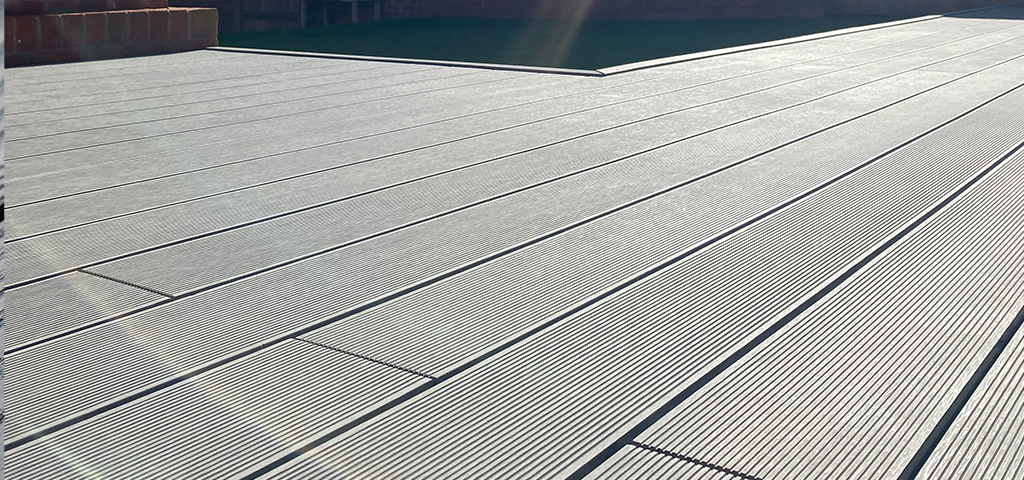
It's important to consider the temperature at the time of installation. If you're laying boards at 15°C or above, they'll likely contract during colder months, which could leave you with larger visible gaps than expected.
At Cladco, we recommend the following butt joint spacing guidelines for our Signature composite boards:
- 7mm at temperatures of 5°C and below
- 6mm at temperatures between 5°C and 15°C
- 5mm at temperatures of 15°C and above
Using Incorrect Fixings or Fasteners
Fixings are often treated as an afterthought during installation, but they play a crucial role in the long-term success of your decking. Even if you follow every previous step in this article correctly, using the wrong fixings can still lead to problems, from splitting joists to damaging the surface of your decking boards.
At Cladco, we offer a wide range of decking clips and screws tailored to suit specific ranges - from Signature and ProDeck to our bamboo and aluminium decking boards. Our installation guides recommend the most suitable fixings for each decking type, and if you're unsure, our team is always happy to help. To ensure your composite decking remains covered by warranty, Cladco fixings must be used.
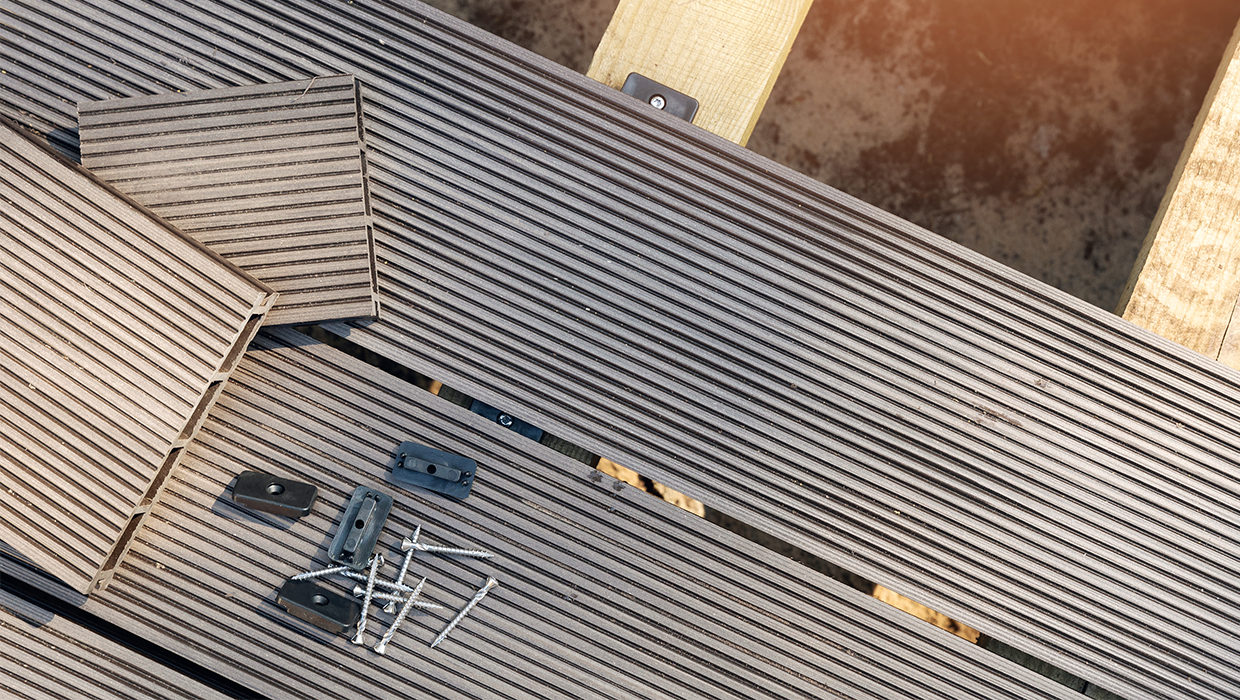
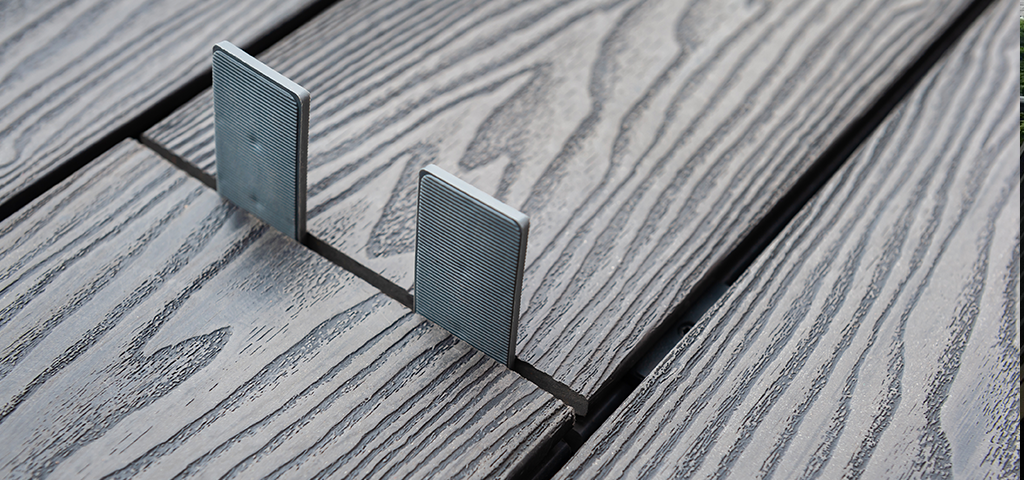
Sharing Decking Clips Between Boards
Decking fixings are designed for specific purposes, and using them incorrectly or trying to cut corners often leads to problems down the line.
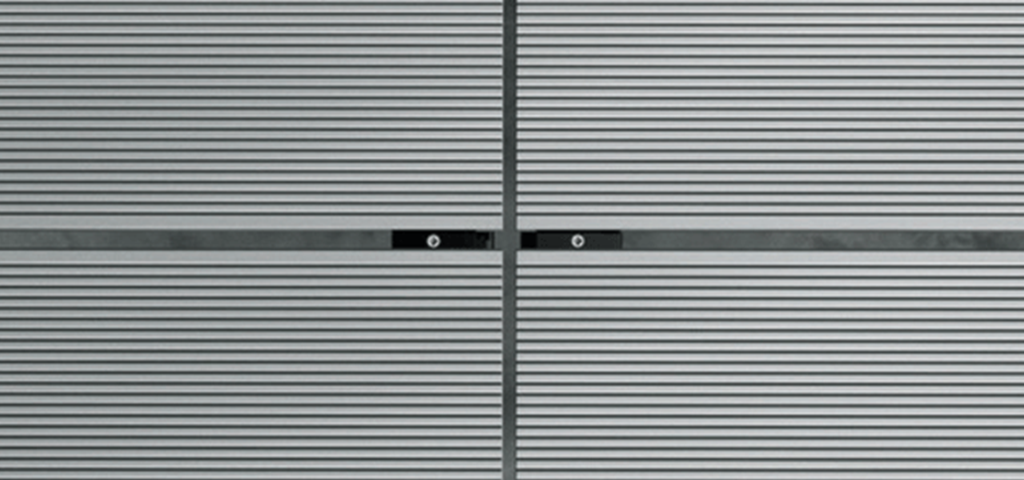
At butt joints, for example, each decking board must be secured with its own clip at the point where they meet. Attempting to save time or money by sharing clips between boards places strain on the boards, which ultimately will lead to cracking and splitting. Over time, this can lead to loosening boards or even structural failure.
For Cladco Signature composite decking, we recommend using eleven T-clips per 4m Signature board and eight T-clips per 2.4m Signature board to ensure a secure and reliable installation.
Screwing Directly Into Decking Boards
While traditional timber decking may have been fine to secure with a bag of nails and a hammer, composite decking is a different story. As we've already touched on, it requires specialist clips and fixings designed to support a safe, stable, and long-lasting installation.
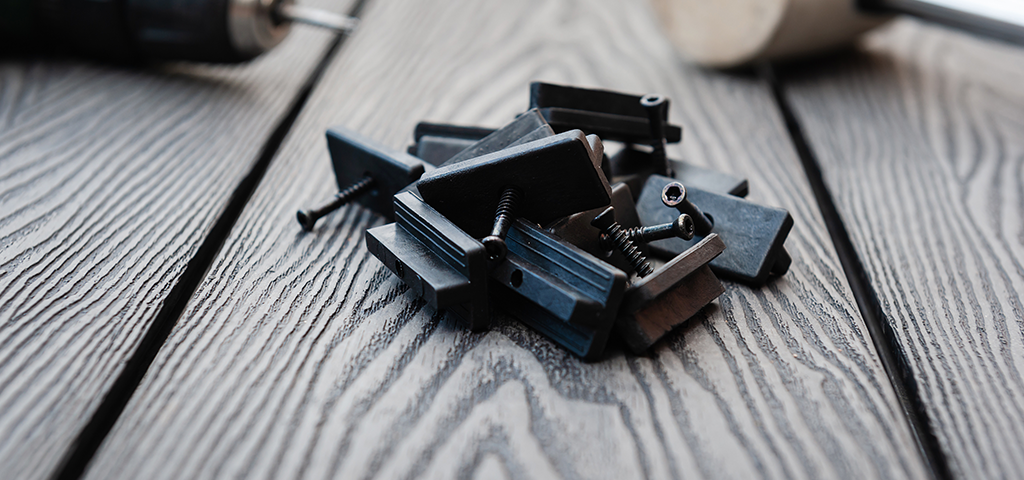
If you're new to decking, it might seem logical to screw or nail directly into the boards, but this would be a serious mistake. As discussed earlier, composite boards expand and contract with temperature changes and driving fixings straight into them can lead to cracks, stress points, or visible damage.
Instead, our specialist T-clips slot into the groove along the edge of each board and are fixed into the joist using a screw through the top of the clip. This method ensures the boards are held securely in place while their surface remains untouched, preserving the clean, high-quality finish.
Conclusion
We’ve now explored some of the most common mistakes people make when installing decking, all to help set you up for a successful, stress-free project. Hopefully, you’re walking away with a few helpful tips before you even reach for the tape measure or spirit level.
If you’re still unsure about any part of the installation process, it’s worth taking the time to fully understand the materials you’re working with. Researching products online is a great place to start, and if you need further guidance, your decking board manufacturer should be able to walk you through the process.
If you’re using Cladco products, we provide detailed installation guides for every product range, along with a variety of informative articles like this one to help inspire and inform your next project. And if you need more support, feel free to get in touch with our friendly, knowledgeable team — we’re always happy to help.
