How to install your composite decking?
Click here to download our Wall Cladding installation guide
Before starting your composite decking area
Once your composite decking boards arrive we advise leaving them outside in the elements for 24 hours to allow them to acclimatize to the conditions prior to beginning work. It's not advisable to install composite decking in cold temperatures.
Cladco composite decking materials can be worked with using traditional woodworking machinery and tools. You can use a saw designed for wood which has a fine-tooth blade enabling you to accurately cut boards to size. If you are cutting the boards, it's imperative you support the composite decking boards below.
Before carrying out any DIY or building work, you should ensure your safety is first priority with precautions such as wearing a mask, safety eyewear, dust mask, and gloves.
Building your new deck
1: Build a supporting substructure
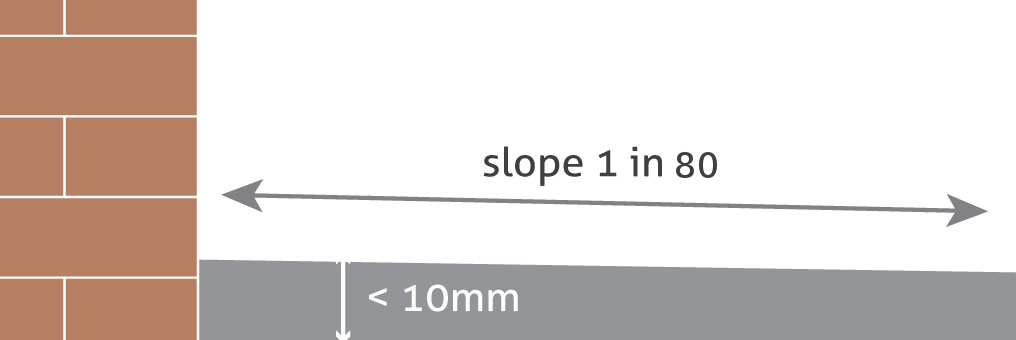
If using a concrete sub-base you should ensure the concrete is a minimum of 10cm thickness and has a sufficient minor slope – a suggested gradient of 1 in 80 will allow water to run away from the building or property and ensure the water does not pool under the deck.
The WPC joists should be fastened to the concrete base using screws through the joists and plastic raw plugs in the concrete base. They should be fixed so as to create parallel, regularly spaced rows in-line with the slope of the concrete base, again to allow for the run-off of water.
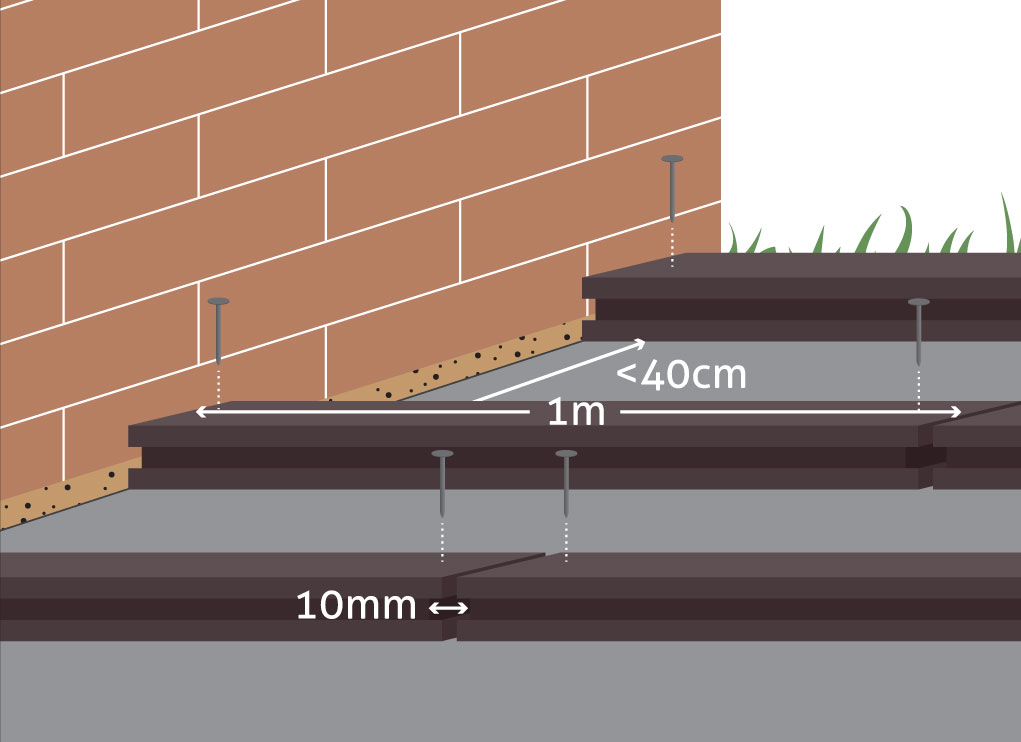
The maximum recommended space between joist rows depends on the angle at which you intend to lay your boards in relation to the joists, but should never exceed 40cm, please see diagram below.
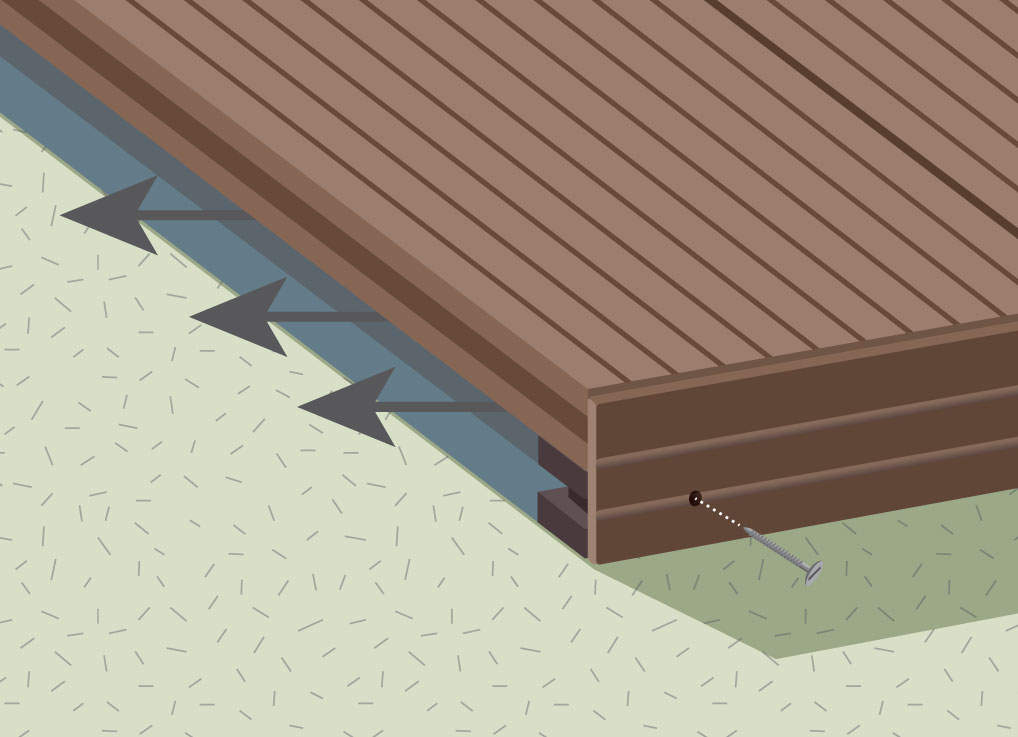
You should ensure there is a sufficient gap with a minimum of 15mm left between the joist ends and any fixed structure such as the house or fence. This gap will allow for sufficient drainage and ensure any temperature expansion is supported.
Remember the suitable supporting substructures for your deck will vary with the circumstances. If you are unsure contact our Customer Service Team on 01837 659 901
2: Fix decking boards to joists
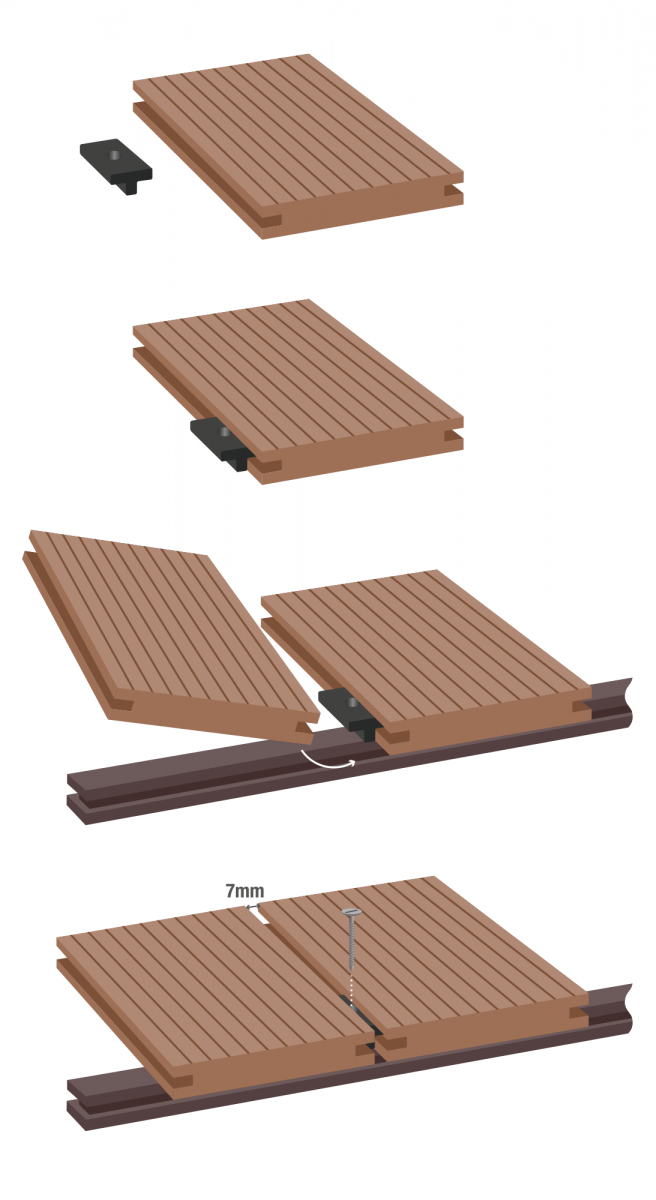
Cladco composite decking can be easily secured to joists which are on a substructure support base using Cladco t clips with stainless steel screw. These clips allow sufficient expansion and contraction of the composite decking boards.
To begin, start with the outside area which is to have a composite decking place the first decking board and using a starter clip and screw system, screw down into the joist which crosses underneath. The next edge which is going to sit alongside another composite decking board, install a set of composite t clips into the groove and once again screw down into the joist below. Its advisable to use one t clip onto each of the supporting joists.
The next composite decking board can be installed by sliding the board onto the t clip row which is secure. You can then install another row of t clips to the new edge again screwing into the joists. Keep following this process to fit all the subsequent composite decking boards into place,attaching the final board in a similar manner to your first.
Composite decking boards must be properly supported!
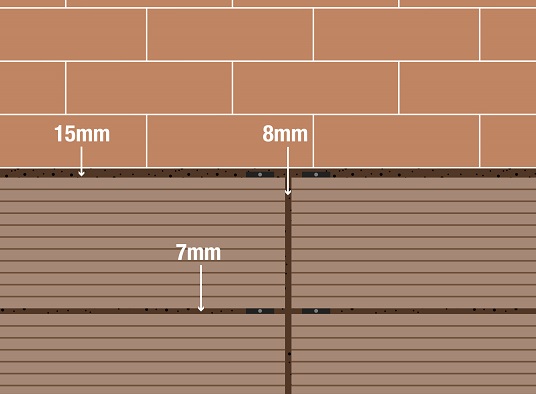
Minimum spacing requirements
It is recommended that a gap of at least 7mm is maintained between the sides of adjacent boards to allow for drainage and expansion due to temperature changes. The use of plastic T-Clips helps ensure these gaps are maintained.
Gaps of 8mm at butt joints – where the ends of two boards meet, and of 15mm between the edges of boards and objects such as wall should also be observed for similar reasons.
3: Finish your deck
Cladco composite skirting trims can either be glued to the edge of the joists using sumogrip adhesive or alternatively, you can screw them into place through the joist. Its advisable to leave a minimum gap of 8mm between any composite skirting trim and the ends of composite decking boards to allow for expansion, expansion can happen with temperature variations. Corner trims can be applied subsequent to skirting trims to achieve a finishing touch by screwing them directly into the joist below the decking..
We recommend that you allow for circulation of air within the decking project by not completely sealing the decking area, this will also allow for any drainage.
Job Done!