So you've just spent a lot of time and money installing timber decking, it's been a few months or years, and you've noticed the substructure, joists, and some of the boards are starting to rot slightly. Repairing rotted deck Joists is one of those tasks which is sometimes necessary to ensure your Deck stays safe and secure.
Your Deck Joist is in the perfect environment for rot; the rot is caused by a fungus that thrives off of darkness, dampness and warm temperatures, all of which occur very easily beneath your Decking. While wood is susceptible to rot and weathering, the material is extremely durable and can often withstand the elements well. While lumber is an incredibly versatile and durable product, rotting joists and creating replacement joists and boards are very common.
Unfortunately, removing your Decks Joist post for replacement is a slightly larger job, unlike standard Decking panels. This article will explain how to repair rotted wood on Deck and help prevent rotting Joists by treating, caring, and replacing the lumber parts.

Article Contents
- Recommended Tools & Materials
- How to Repair Deck Joist Rot
- Step by Step: Repairing Deck Joist Rot
- How to Prevent Deck Joist Rot
- Step by Step: Preventing Deck Joist Rot
- What Causes Deck Joist Rot?
Recommended Tools & Materials
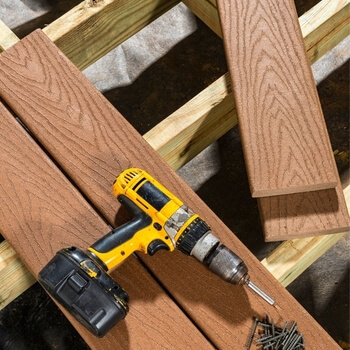
When fixing or replacing rotted deck joists, here are a few tools and materials we recommend you use for the DIY project.
Essential Tools:
- Pry Bar - For removing Boards, and nails
- Claw Hammer - for replacing and removing nails and working with wood
- Safety glasses, gloves and old clothes
- Saws - Hand saw, Mitre Saw or twin blade saw
- Decking Screws / Nails
- Power Drill
Recommended Tools:
- Treatment
- Cleaner
- Sandpaper / Power sander
- Paint Brushes / Paint Roller
- Broom
- Tape measure - Tape can be used to ensure any replacement planks/Joists are the correct lengths
While not all of these tools are essential to replacing or repairing your rotten wood, the tools may help with the process. See below for a step-by-step guide.
How to Repair Deck Joist Rot
When installing timber elements in your garden, there is a high chance that at some point, you may have to do some essential repairs due to wood rot.
Due to your Decking being installed outside, where it has to battle the elements daily, and being exposed to moisture, treated or untreated lumber can start to rot. If the substructure and joists of your Decking project begin to deteriorate, then it is important to replace or treat the material.
There are two forms of rot, dry and wet rot. Wet rot happens when your timber has been exposed to moisture in the air, penetrating the wood, causing it to break down and rot. While dry rot is less common, it is caused by certain fungi which attack and eat the vital parts of the lumber.
If you are repairing rotted deck posts, follow the below steps.
STEP BY STEP: REPAIRING DECK JOIST ROT
Step 1:
Identify where the rotting Joists are situated and how many you need to replace. Rot is not always visible. Some tell-tell signs of rotten wood in your decks' joists are the following:
- Visible external rotting
- Discoloured exterior
- Soft/ Spongey interior
- Bubbled paint
- Crumbling wood
- Holes and large pores within the wood
To repair rotted deck joists, ensure you purchase the correct Joists for your Deck before replacing them.
Not all weakened Deck Joists have been rotted out, and some may need to be replaced due to weaknesses such as cracks and splinters.
Step 2:
To get to the Decking Joists, you may have to remove the Boards on the Decking surface. Remove the Boards with a pry bar or claw hammer.
Insert your pry bar or claw hammer into a gap on the plank, and hooking underneath, then pull out of the Deck. Do this for as many Boards as necessary.
In some cases, the entire deck may need to be completely removed to repair the rotten Joists. Once the planks have been removed, reverse the Boards and hammer the nails back through the Boards to remove them. If the fasteners, nails, or screws cannot be removed, use a screwdriver for ease.
Step 3:
Once you have gained reasonable access to the joists, remove any nails or screws in the post with a chisel, hammer, or pry bar.
Typically Joists are larger and installed anchored within the concrete, making them harder to remove than deck boards. If you would like to keep the Joist, work the Joist out of the ground slowly, being sure to keep the Joist in one piece.
If you would like to remove the Joist completely and replace it with a new one. With a circular saw or one of your chosen, start to cut parts of the Joists off into easy to handle parts. Work your way down to the Joists and slowly remove the Joists completely from the project. The removed Joist can then be replaced with a new joist.
Step 4:
Once you have removed the Joists, inspect the portions rot, and remove the rotted wood with a chisel or a pry bar. If you have multiple Joists or Boards which are rotting, use your pry bar and remove nails, screws, and rot, ready to replace them.
Step 5:
Once the rotted areas of the structural Joist have been removed, the next stage is to protect the wood from any further attack of rot. Wood filler can be applied to the Joists in areas where the rot has been cleared out. Once all areas have been filled, apply a treatment or sealant of your choice following these stages:
1) If able to sand down the Joist
2) Apply your desired sealant or treatment
3) Allow the first coat of sealer to dry, and then apply a second coat
3) Apply varnish, or taint if necessary
Ensure all sides of the wood and any other wood you are adding for structural support have been treated, helping to prevent further rotting of the Joists.
Step 6:
If the rotten wood and rot exposure has left your Joists weaker than before, your joists may benefit from attaching reinforcing wood or boards.
Cut your pressure treated wooden board to the correct size for your Joist, and fit it securely to the side of the supporting structural component, using nails or screws.
Step 7:
Refit the Joist in place and install your Decking Boards, making sure to remove any rotten wood and treat any Board that needs it.
Learning how to repair your existing Decking is a great skill to have, saving you time, money and bringing you life experiences all in one.
TOP TIP: If you have to replace any Decking rotting Decking Planks or Joists, using pressure-treated wood, and ensure to treat, varnish, seal and paint the wood you are using to help prevent the wood from rotting again.
How to Prevent Deck Joist Rot
If you take the preventative steps to protect your Decking Joist against Rot, you may be able to extend the life of your materials.
For rot to destroy your wood, it relies on a few variables, preventing some of these variables from occurring, which can, in some cases, help prevent exposure of rot to your wood. Rot is a fungus which attacks your wood, and you can avoid dry and wet fungi by simply removing what they feed off of.
Fungi thrive off of the following:
- The right amount of oxygen
- The correct food source
- The correct temperature
- Moisture
- Source of infection (your wood)
Remove one or two of the above, and with a little bit of DIY, you can help protect your lumber from rotting.
STEP BY STEP: PREVENTING DECK JOIST ROT
1) Ventilation: Making sure your Deck is well ventilated around the boards and joists will help the boards dry, helping to prevent rotting. The key is air circulation, which will help speed up your deck materials' drying process after rain and help reduce the growth of lumber-eating fungus.
2) Sealing Wood: Treat your wood with a water repellent sealer. This will help reduce the amount of moisture in the wood. For fungi to grow and live, the wood should have an 18%moisture content. A wood sealant will help prevent the lumber from becoming storing water. Find out the best steps to seal your Decking Boards and other wooden surface here.
3) Drainage: Ensure your Deck has sufficient drainage, any trapped water that can seep into treated or untreated Decking, which can result in rot ruining your Decking support Joists. If applying sufficient drainage to your area, try to redirect where the water will run, diverting the water away from any boards or joists. Any wood that is standing in water will become moist and will encourage rot to take place.
4) Pressure Treated Wood: Using pressure-treated wood to build your Deck is recommend for any large home improvement project like a Deck. Pressure Treated Deck Boards and Joist still may need additional treatment and paint.
5) Annual Checks: Checking your Decking regularly, including all Boards, Posts and fasteners, for cracks, splinters, rot and fungus. Regular maintenance of your Deck, treating, sanding, repairing, and staining can help your wooden aspects last longer.
What Causes Deck Joist Rot?
There are two types of rot, wet and dry rot. Dry rot leaves your Deck with large cracks, splinters and discolours the lumber. Wet rot is a fungal infection of the wood and makes your wood crumbly, damp and unsafe.
Fungal infestations, which causes rot is the natural decay of natural materials, such as your timber decking. It can be incredibly frustrating when it starts to attack your Deck. Wet rot feeds off of very damp wood, with a moisture content of around 30%-50%. Dry rot can penetrate your wood with a moisture count of as little as 20% moisture, so to prevent your Deck from encouraging the growth of dry or wet rot, aim to keep your wood materials moisture content at 18% or less.
While moisture and dampness play a big part in causing Deck Joist rot, several other factors also contribute to the rotting of wood, such as:
- Lack of airflow - Fungus is encouraged to grow and thrive in areas of certain temperatures. In some Decking projects, the lack of airflow in the substructure causes a damp and warm environment for the fungus to thrive. Ensuring you have adequate airflow is paramount to help reduce rotting.
- Lack of natural light - Fungus is also more likely to spore in darker areas, where the sunshine and UV light cannot penetrate. Where you position, your Deck is vital. If you postition it in a shady and damp area, water will penetrate into the fibres, causing rot. This rot will then create further holes and weaknesses within the wood, which can cause safety issues. When building your decking projects, ensuring your timber deck is not made in a damp, shady area will help prevent the build-up of rot and could help save your hours of labour.
- Damp - While you cannot stop the rain, ensuring your Decking has been properly treated and sealed can help prevent water from absorbing into the fibres. Also, if the Decking has proper ventilation, drainage, and sealant, the chances of water penetration should decrease.
Conclusion:
While adding a Deck to your property is a great home improvement plan, maintaining all aspects of the Deck can be a laborious process.
While pressure-treated wood has certain protection against rotting, warping, and splintering, Cladco Composite and Nordeck Decking Boards are high-quality, low-maintenance products that should not require regular maintenance. Thanks to their low absorption rate, the Deck Boards should have a higher resistance to rotting. Boards should not require a sealer or paint on the surface of the material. Boards can be cut and installed using standard woodworking tools, such as a screwdriver, circular saw, pry bars, and nails.
Find out how many Deck Boards, screws, and fasteners you may need for your Deck using our Decking Calculator here.
Cladco Composite and Nordeck Decking Boards do not need treating, sanding, or painting; shop the range via our website here or by contacting our sales team on 01837 659901.
