
Even if you have used pressure treated timber, as with anything kept outside in the sunshine 24/7, your railings will start to rot, warp and splinter. In this article, find out how to put a Railing on a deck and replace deck railing posts to ensure your Deck will be looking good and lasting for as long as possible. This article will also explain how you can repair or replace your deck railings.
Recommended Tools & Materials
- Drill/Driver and Bit - Essential
- Crowbar - Essential
- Impact Driver - Essential
- Circular Saw and Blades
- Jigsaw
- Table Saw
- Lumber - Essential
- Boards - Essential
- Posts- Essential
- Screws - Essential
- Compound Miter Saw
- Router and Bits - Essential
- Hammer - Essential
- Tape Measure - Essential
- Protective wear such as gloves and goggles, and dust masks when using a saw or drill. - Essential
Learn more about what tools you may need for the maintenance of your Deck here.
Replacing Deck Railing Step by Step
When it comes to your Decking, you want to make sure that it lasts for many years to come. However, when installing a timber deck, the Deck and other components such as Joists, railings, stairs and Fascia Boards can be subject to rotting and becoming damaged. If your Railing becomes damaged, you must replace or repair it as soon as possible, as broken Railing can lead to accidents and injury. See below how you can fix or replace your damaged rails with brand new components, enhancing your Decks safety properties.
STEP 1: REMOVE DAMAGED DECK RAILING
Before you install your new Decking area, it is recommended to fully Check your wooden Deck, including Deck Boards, Posts, Joists, and railings. Have a walk around your Deck and make a note of what posts and railings need replacing. Adding a chalk or pencil mark is one way you can do this.
If you find other areas of concern on your Decking, see our guides here on repairing and replacing Deck Boards and Deck Joists.
If your Decking Railings are rotten, it can be fairly easy to remove them without causing damage to your Deck framing.
1) Remove the screws and nails from the rotted or damaged posts. Use your crowbar or the back of your hammer under the nails and pry them out. If your railings have been installed using screws, use your power drill to remove them.
2) If Decking Boards surround your Railings, you will have to remove the Boards from the bottom rails before taking the rotted rails away from your project. Remove your Deck Board with great care.
3) To remove your Decking Boards, pry away the screws and nails, use a drill if the Board has been screwed down. Once all the nails and screws are gone, you should be able to gently lift the Decking Boards and remove them from the structural Joists.
4) Once the Decking Boards are removed, you should be able to remove your Railings easily
Learn more about removing Posts, Boards and Joists here.
STEP 2: ATTACHING NEW RAILING TO THE DECK
Once you have removed your old, rotten railings from your Deck, it is time to attach your new framing. Follow the below step for attaching Railing to Deck.
1) If you've not bought pre-notched Decking Posts, start by notching out your Decking Posts to your Decks measurements, up from the bottom of your Deck.
2) To fit the posts to the corners of your Decking, hold the Post in position and ask someone to mark where you would like the pilot holes to be screwed.
3) With your power drill, create your pilot holes. An 8mm wood drill bit is recommended.
4) Use a tape measure to ensure all posts are installed at an exact distance for your Railing. There should be a maximum of 1800mm space between your deck posts.
5) Secure your posts to the Deck; if you want the Deck posts to be flush to your existing Deck, mark where you would like the Post to fit on your Fascia Boards.
6) Remove the Fascia with the same steps as above. With your hand saw, remove the wood from the section to which you would like to attach the deck post.
7) with a Jigsaw or Circular saw, cut the area where the Decking Post will be fitted.
8) Insert your Deck Post into the recently cut space, ensuring it is flush with your Fascia Board.
9) Secure the Post in place using the pre-drilled pre-drilled pilot holes
TOP TIP - Before you attach your Deck Posts to your Deck, you may want to stain, varnish or treat the wood. You may need more than one coat of stain to cover your Post. Once you have stained or treated your timber, be sure to wait up to 24 hours before moving on to the next step.
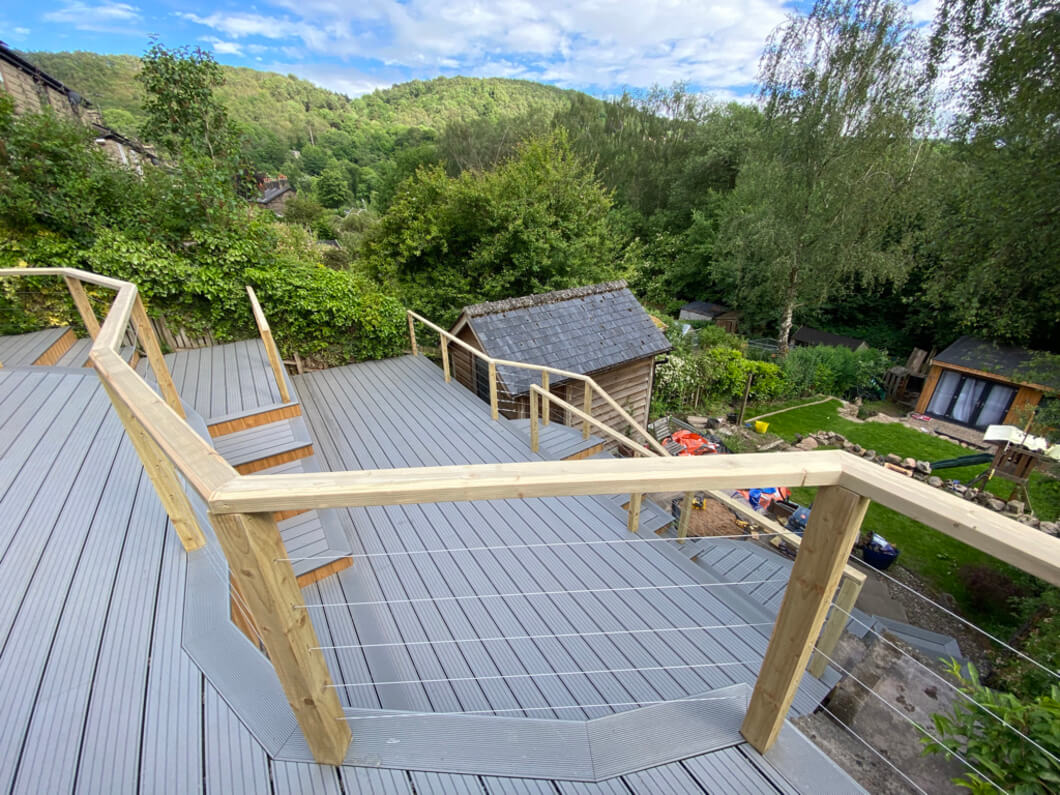
Now that you have your frame is in place, it is time to install the railings. Railings can be fitted vertically or horizontally, depending on your preference. For most timber rails, the individual spindles are installed horizontally. Get the Balustrades and wood for the handrail. You can either get these pre-cut to the correct length for you, or you can position and cut them yourself. Find out how to add a railing to a deck by following the steps below.
1) Measure the height of your Posts.
2) Cut your railings, so the top and bottom can be installed between the top and bottom railings.
3) Make sure your spindles are evenly spaced out by measuring and marking where you want them to go, along the length of your Railing. These should be around 100mm (4 inches) apart.
4) You may want to apply finish to your new railings. It is recommended to purchase pressure-treated wood. However, you may still want to sand and treat your wood. Find out how to treat and seal your wood here. Make sure to seal any ends of the wood which have been cut, preventing moisture from entering. Let the lumber dry completely before moving on. Apply another coat of stain or treatment if required.
5) Start attaching the individual balusters to a thin bit of wood. This will then, in time, attach to your handrail. Screw the end of one of your balusters to the thin layer of wood. Make sure the Railing is attached at least three-inch away from the edge of the wood. (1.5 inch - 2-inch screws are ideal)
6) Attach the remainder of your Balusters to the sections of thin wood. Make sure they are positioned at the correct distance (every 3 inches)
7) Once you have finished securing your railings to the top piece of wood. Attach a second piece to the bottom. Screwing the thin wood to the bottom of your treated balusters. Attaching a thin wooden Board to your rails will provide your project with increased stability.
STEP 3: ATTACH RAILING TO STAIRWAY POSTS
Once you have added your railings to the length of the thin wood in as many sections as your project demands, it is now time to secure the railings to the edge of your Deck, replacing the old deck rails. The below stages can be applied to exterior stairs, Decks and a variety of other projects.
1) Secure your bottom Railing to your Stair or Decking Posts. Use bricks, scraps of wood, or other implements, to hold your base railing off of the surface of your Deck at the correct height to install on your Posts.
2) Pre-drill your screw holes at the base of the Post, ensuring these are at an angle and not too near the edge of your Post.
3) With 3-inch or 4-inch screws, drive the screws through the base of the railings through the pre-drilled pilot holes until secure.
4) Once your bottom rail is in position, you can fit your thin layer of wood with the railings attached. Depending on your preferences, you can fit the bottom rails wood with either short screws or nails, making sure the nails or screws are no longer than the thickness of the lumber.
5) Repeat for all sections of your Balustrades. Measure the distance between the posts, mark how many Railing will need to be fitted and repeat the process.
Always start with securing the bottom rail before going to attach your handrail for ease of installation.
7) Once all the Railings, top and bottom rails have been installed, you may want to do the final sand, treat and finish of your railings. Ensuring your handrail wood is pressure treated will increase its resistance to warping, rotting and splintering as well as its longevity, so you shouldn't have to work on replacing your Deck for many years to come.
TOP TIPS: When you get to the point where your top rails meet each other, position the railings, so they are lined up and screw in place.
STEP 4: ALIGN THE CAP
The top of the Decking Railing is often referred to as the Cap. Once you have completed the above steps and your bottom rail is securely in place. You can work on installing your top rail. The top rail will
1) Position your rail cap on top of your posts, ensuring it is flush with the inside edge of the rail and posts.
2) Drill pilot holes for your screws from the underside of the thin piece of wood. Make sure to position a pilot hole every 12 inches.
3) Drill the screws into the Post from the underside of the Railing.
4) ensure your handrail/cap is in line with the Post, with each end being fitted at a 45-degree angle. Do this by drilling 1/8-inch pilot holes into the Post with 16inch nails, using stainless steel or galvanised for a high-quality fitting.
TOP TIP: You may want to add a smooth, curved edge to your cap/railing. Adding 'rips' to the surface of your exterior hand railings can improve the Decks appearance while also allowing rain to easily flow off the edge of your Railings surface, helping prevent watermarks, stains or rot appearing on the lumber.
STEP 5: MITER YOUR RAILING
A miter joint is made by joining two parts together. This is done by attaching two wood parts across the main surface, normally at a 45-degree angle, forming a corner. The corner or edges can meet and create corners of any size or angle.
1) Cut the lumber that is going to be butted together to have 45 degrees angle end. (When the two mitred ends are butted together, they will create a 90-degree corner. The best tool for making these cuts would be a miter saw.
2) Position the two pieces of wood on your rail and mark where the wood will need to attach.
3) Apply woodworking glue to the base of your wood, and place it on your frame.
4) You may want to attach the miter edge with Decking screws or nails for a secure finish. However, be sure to wait a minimum of 24 hours for the glue to dry.
5) Attach the Decking Screws or your choice of the nail through the base of the Railing. Insert the fasteners at an angle into the wood for a secure fit.
STEP 6: ATTACH THE DECK RAILING CAP
Once you have attached your Railing to your wood Deck, you may want to add a decorative post cap.
1) Cut the caps, so they are the appropriate size for your Deck post.
2) Drill 1.8inch Pilot holes into the Posts
3) Attach your chosen Cap to your Post with two 1\2 inch Deck screws
Step back and admire your handy work.
Average Cost to Replace Deck Railing
The average cost to replace your Deck Railings will differ depending on what materials are used, how large the installation is and the extent of the damage on the project.
The average cost to replace a Timber Decking Rail can range from the cost of materials to materials, stain, varnish, deck screws and hours of labour.
Find out more about the average costs of deck railing here.
How to Reinforce Deck Railing
1) Tighten any Deck screws and bolts.
2) Add Pressure-treated blocks to any posts for additional support - Install timber blocks staggered around the
3) Drive your nails and screws through the additional block and into the base of the original Post using deck screws.
4) Install the remainder of the Blocks around your Railings in regular intervals.
Popular Types of Deck Railing
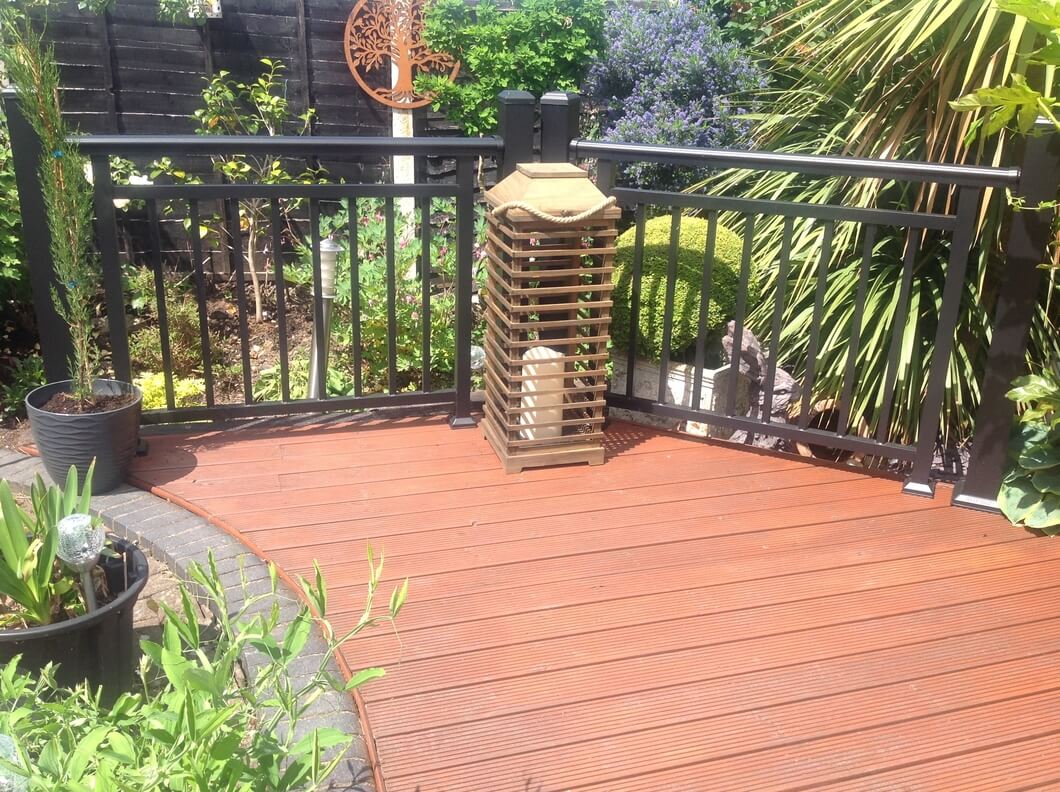
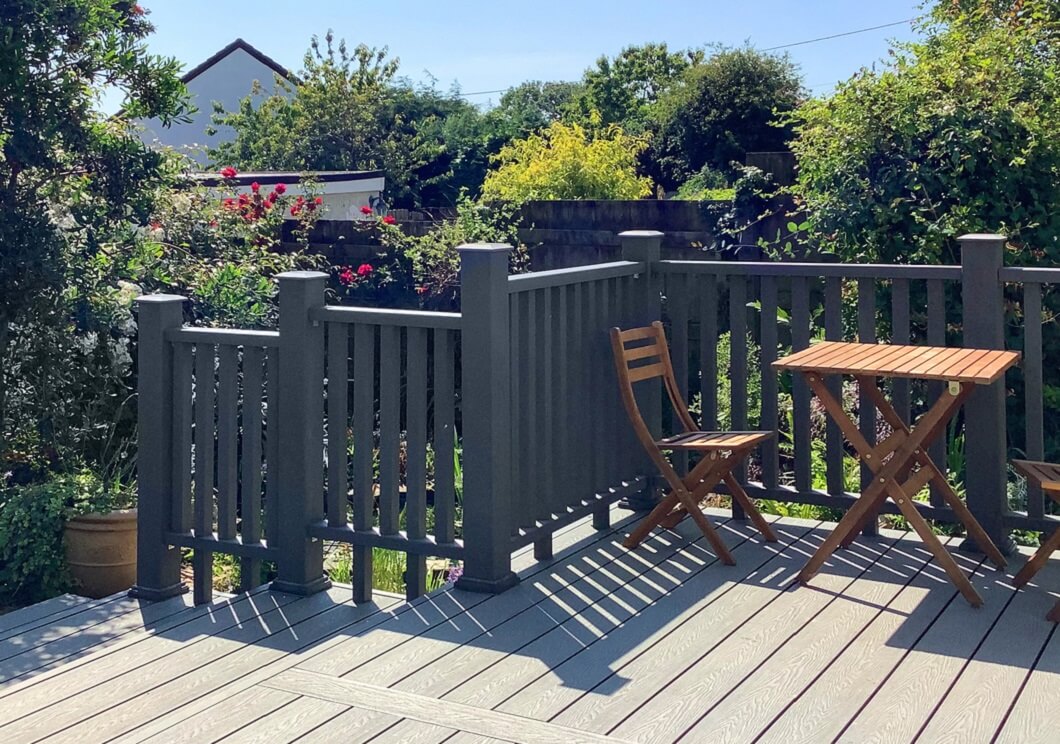
Adding a metal railing to your Deck is a fantastic way to create a safety barrier and Deck feature for your garden, which requires little to no maintenance. The above Decking Design has used Cladco Composite Decking in Redwood colour with a Cladco Powder-coated Aluminium Balustrade fitted.
Metal Railings do not require treating, sanding or varnishing, and often come in pre-made railings, saving you the hassle of building your own.
ALUMINIUM DECK RAILING KITS
Aluminium Deck Railing kits are a simple and fast way to install a Decking Balustrade around your Decking area. With no welding needed, Aluminium Deck Railing Kits come pre-assembled for your convenience.
Available in a range of lengths, lightweight and easy to install, the aluminium railings require little to no maintenance, thanks to their corrosion and rust-resistant properties. Making it a firm favourite for most garden designs.
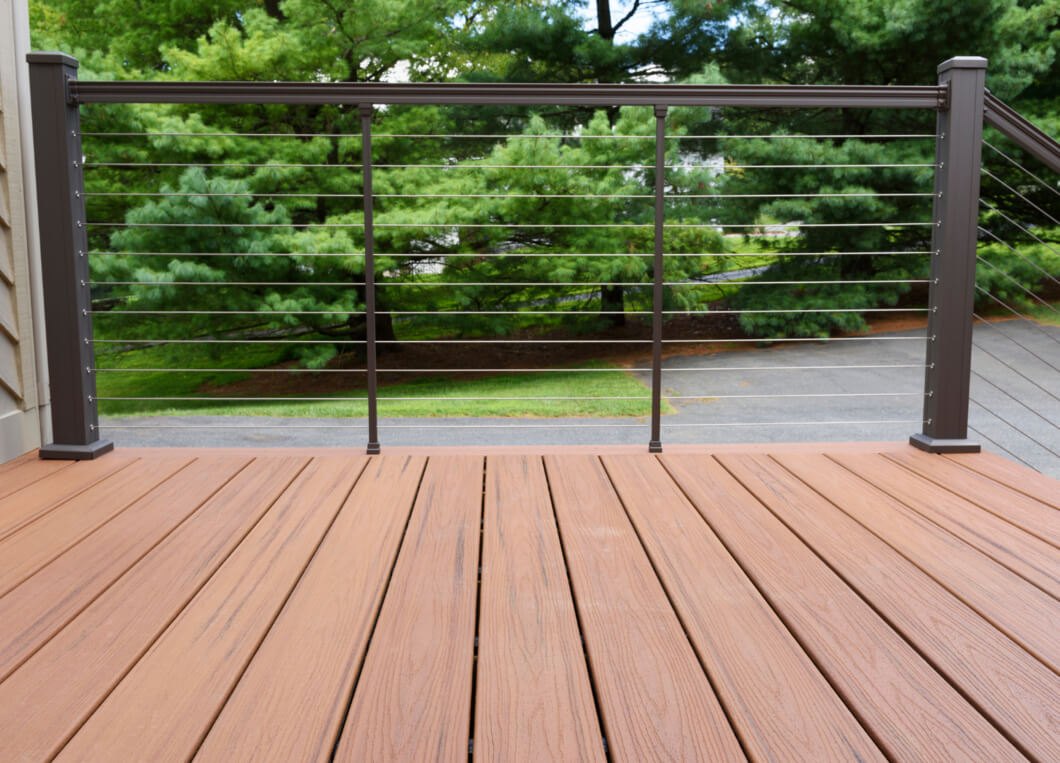
STEEL DECK RAILING
Steel Deck Railing can be added to the edges of our Deck with ease. And are available in either traditional appearance or wire/cable railings.
The Wire and Cable Steel Deck Railing have inch-thick cables installed vertically across the Balustrade, and the attractive Railing does not obscure the view surrounding your Deck.
CONCLUSION:
Adding a rail/Balustrade to your Decking is a fantastic way to transform the look of your garden while also keeping the Deck safe. And installing a timber rail is a fantastic way to keep the wooden, traditional appearance throughout your design. However, like most natural products, timber can rot and weather over time.
We at Cladco offer a high-quality, low-maintenance Powder-coated Aluminium Balustrade System, which can be installed on various Decking projects. Cladco Balustrades do not require regular maintenance and should not mark, stain, rust or corrode.
Find out more about our range of Garden Decking and Balustrades via our website or by talking to a member of our friendly team on 01837 659901.
